main |
sidebar
Thursday, November 5, 2009
 During my travels throughout Europe, I take every opportunity to explore the little museums that house small collections of jewelry. I'm always amazed by how similar our modern wire jewelry is to the designs of the ancients—although they worked with solid gold, and most of us don't have that opportunity.
Such was the case two years ago when I was teaching a workshop in Cortona, Italy. A small Etruscan Museum is located right in the center of town, and it holds a small but fascinating collection of wire jewelry made from solid gold wire. As I examined the pieces the best I could through the glass, I noticed that the ancient Etruscans used very fine wire to coil and spiral their delicate earrings and links for necklaces and bracelets.
I pondered then how easy it would be to make my own little pair of Etruscan Earrings using baby coiled beads of fine-gauge wire... And, as it turns out, it was very easy once I'd figured out the wire measurements needed.
I hope you enjoy making your own pair of Etruscan Earrings, and perhaps you'll consider joining me Sept. 1-11, 2010, when I return to Cortona to teach a workshop on wire jewelry making. For more information, click here.
What you need: round nose, chain nose and flat nose jewelry pliers, flush cutters, 0000 (superfine) steel wool, two ear wires (commercial or handmade), round, dead-soft wire: four feet of 26ga, one foot 24ga, six inches 22ga
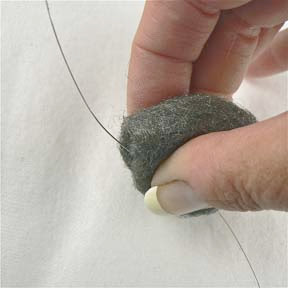 Step 1: Clean your wire thoroughly with 0000-steel wool (hardware store) or with polishing pads from Rio Grande (order #337-020).
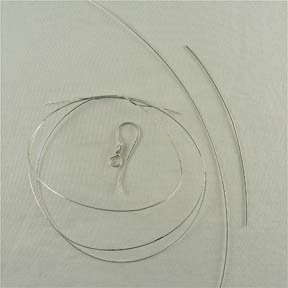 Step 2: Assemble your materials to make a pair of earrings. You'll need to flush-cut your wire so that you have two pieces of 26ga measuring two feet each, two pieces of 24ga measuring six inches each, and two pieces of 22ga measuring three inches each.
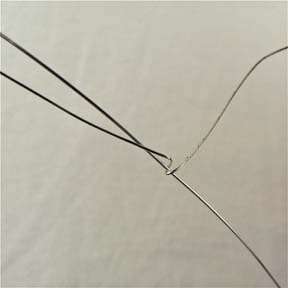 Step 3: Begin coiling the 26ga wire onto a piece of 24ga wire.
 Step 4: Coil tightly near one end of the 24ga wire, trying to avoid gaps between the coils. When coiling fine-gauge wire, it's a challenge to keep the coils tightly wound adjacent to one another without gaps; my best advice is to coil slowly.
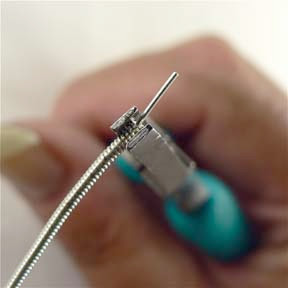 Step 5: When you've coiled the entire length of wire, press down the ends firmly using small flat nose pliers.
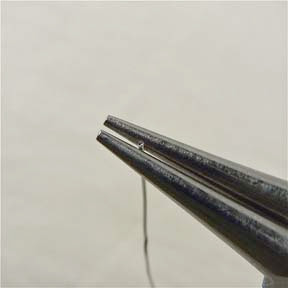 Step 6: Take hold of one end of the wire near the tips of the small round nose pliers.
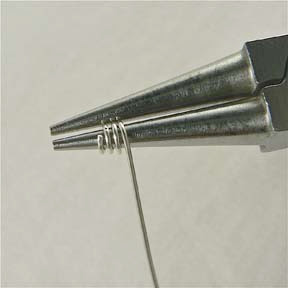 Step 7: Turn the tool around and away from you and coil the wire onto the tool three times, working from the tip down toward the box-joint on the tool. Stop once you've coiled three times.
 Step 8: Push the 26ga coiled wire up to the tool as shown.
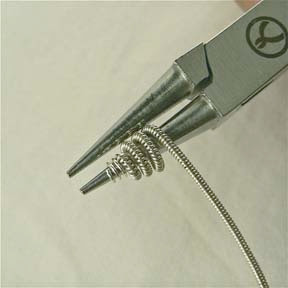 Step 9: Continue coiling the wire onto the tool as before.
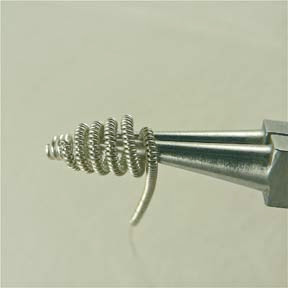 Step 10: When you have about one inch of coiled wire left, open the pliers slightly and shift the developing bead back toward the tips of the tool. This is so that you create a coiled bead with a more rounded shape.
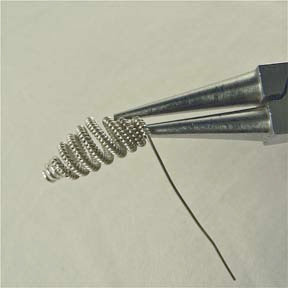 Step 11: Once you've completely run out of coiled wire, remove the bead from the tool. Note how the bead is shaped, with two ends that are more tightly coiled than the center, which is more rounded.
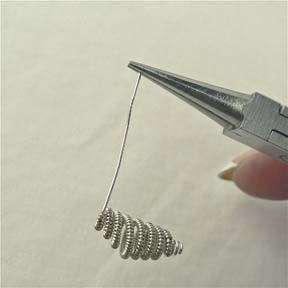 Step 12: Turn the bead over so that it resembles an L shape. Place the bare wire end near the tips of the round nose pliers as in step 6.
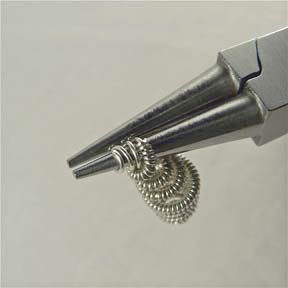 Step 13: As in step 7, turn the tool away from you in your hand to coil the wire onto the lower jaw of the pliers, coiling the bare wire onto the tool toward the box-joint.
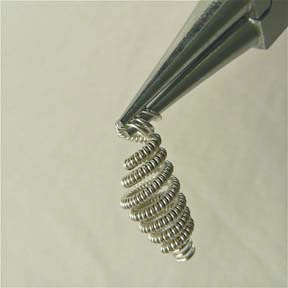 Step 14: When you can't coil the wire onto the pliers any more, remove the tool and reinsert the tip into the end of the bead from the opposite direction, as shown.
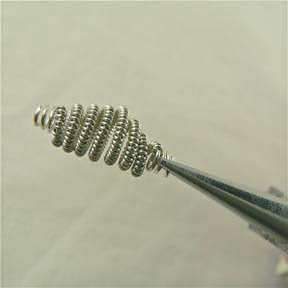 Step 15: Twist the tool in your hand until the bead ends match in orientation. This takes a bit of practice if you've never done it before; just try to match the photo as best you can.
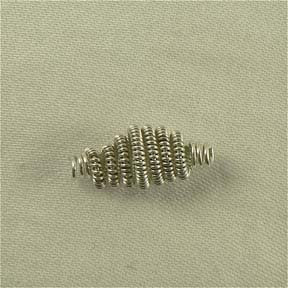 Step 16: This is the finished baby coil-wrapped bead. You'll need two of these for a pair of earrings, so repeat the steps above with your remaining wire to make a second bead.
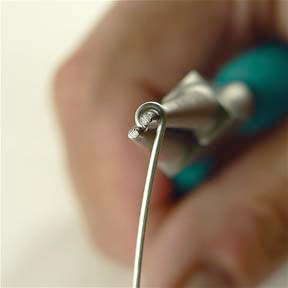 Step 17: Pick up the 22ga wire in the tips of the small round nose pliers and form a small loop in preparation for making a small spiral.
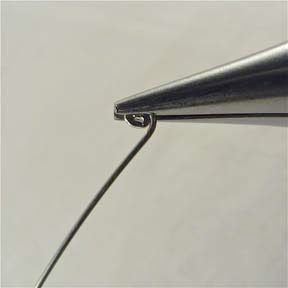 Step 18: Use the small chain nose (or flat nose) pliers to spiral in the wire tightly.
 Step 19: Continue spiraling until the wire measures 1-1/2 inches exactly, from one end of the wire to the outer edge of the spiral.
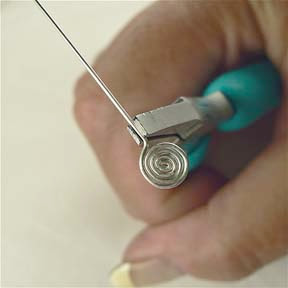 Step 20: Use small flat nose pliers to bend the wire straight up out of the spiral so that it resembles a lollipop.
 Step 21: Repeat these steps with the second piece of 22ga wire you cut earlier, and then place a baby coil-wrapped bead on one of the spirals.
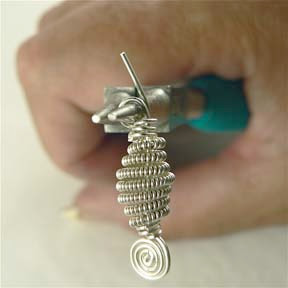 Step 22: Take hold of the bare wire in the middle of the round nose pliers and form a loop near the end of the bead.
 Step 23: Use chain nose pliers to bend the loop back.
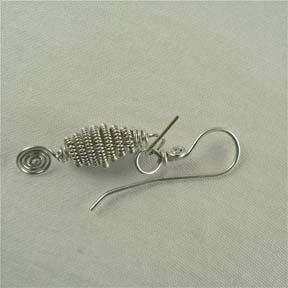 Step 24: Before you wrap the eye-pin loop you just made, open it sideways and place an ear wire on the loop. This ear wire can be commercial or handmade. To learn how to make a simple ear hook, click here.
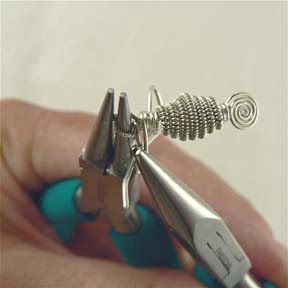 Step 25: Wrap the loop securely. This creates a permanent link between the ear hook and the bead dangle.
 Step 26: here is the finished earring. You may need to gently press down the wire ends in the tips of the chain nose pliers. Repeat all of these steps to create a second earring with bead dangle, and you have just made your own pair of Etruscan Earrings—just like the ancients!
 Step 1: Clean your wire thoroughly with 0000-steel wool (hardware store) or with polishing pads from Rio Grande (order #337-020).
 Step 2: Assemble your materials to make a pair of earrings. You'll need to flush-cut your wire so that you have two pieces of 26ga measuring two feet each, two pieces of 24ga measuring six inches each, and two pieces of 22ga measuring three inches each.
 Step 3: Begin coiling the 26ga wire onto a piece of 24ga wire.
 Step 4: Coil tightly near one end of the 24ga wire, trying to avoid gaps between the coils. When coiling fine-gauge wire, it's a challenge to keep the coils tightly wound adjacent to one another without gaps; my best advice is to coil slowly.
 Step 5: When you've coiled the entire length of wire, press down the ends firmly using small flat nose pliers.
 Step 6: Take hold of one end of the wire near the tips of the small round nose pliers.
 Step 7: Turn the tool around and away from you and coil the wire onto the tool three times, working from the tip down toward the box-joint on the tool. Stop once you've coiled three times.
 Step 8: Push the 26ga coiled wire up to the tool as shown.
 Step 9: Continue coiling the wire onto the tool as before.
 Step 10: When you have about one inch of coiled wire left, open the pliers slightly and shift the developing bead back toward the tips of the tool. This is so that you create a coiled bead with a more rounded shape.
 Step 11: Once you've completely run out of coiled wire, remove the bead from the tool. Note how the bead is shaped, with two ends that are more tightly coiled than the center, which is more rounded.
 Step 12: Turn the bead over so that it resembles an L shape. Place the bare wire end near the tips of the round nose pliers as in step 6.
 Step 13: As in step 7, turn the tool away from you in your hand to coil the wire onto the lower jaw of the pliers, coiling the bare wire onto the tool toward the box-joint.
 Step 14: When you can't coil the wire onto the pliers any more, remove the tool and reinsert the tip into the end of the bead from the opposite direction, as shown.
 Step 15: Twist the tool in your hand until the bead ends match in orientation. This takes a bit of practice if you've never done it before; just try to match the photo as best you can.
 Step 16: This is the finished baby coil-wrapped bead. You'll need two of these for a pair of earrings, so repeat the steps above with your remaining wire to make a second bead.
 Step 17: Pick up the 22ga wire in the tips of the small round nose pliers and form a small loop in preparation for making a small spiral.
 Step 18: Use the small chain nose (or flat nose) pliers to spiral in the wire tightly.
 Step 19: Continue spiraling until the wire measures 1-1/2 inches exactly, from one end of the wire to the outer edge of the spiral.
 Step 20: Use small flat nose pliers to bend the wire straight up out of the spiral so that it resembles a lollipop.
 Step 21: Repeat these steps with the second piece of 22ga wire you cut earlier, and then place a baby coil-wrapped bead on one of the spirals.
 Step 22: Take hold of the bare wire in the middle of the round nose pliers and form a loop near the end of the bead.
 Step 23: Use chain nose pliers to bend the loop back.
 Step 24: Before you wrap the eye-pin loop you just made, open it sideways and place an ear wire on the loop. This ear wire can be commercial or handmade. To learn how to make a simple ear hook, click here.
 Step 25: Wrap the loop securely. This creates a permanent link between the ear hook and the bead dangle.
 Step 26: here is the finished earring. You may need to gently press down the wire ends in the tips of the chain nose pliers. Repeat all of these steps to create a second earring with bead dangle, and you have just made your own pair of Etruscan Earrings—just like the ancients!
I hope you enjoyed this tutorial. If you feel the need to see coil-wrapped beads in motion, I have demonstrated them in my DVD, Tribal Treasures Bracelet Workshop, currently on sale for $24.95. To learn more, click here.
Happy wrapping,
Sharilyn
0 Comments:
Subscribe to:
Post Comments (Atom)
Labels
- wire (1)
Text
Template Designed by SkinCorner | Sponsored by GosuBlogger
Copyright © 2009 Complicated Girl. All Rights Reserved.
Copyright © 2009 Complicated Girl. All Rights Reserved.